When should drive belts be replaced on a single-stage snow blower? If you are noticing your snow blower lacks the power it used to, or if it has been between five and seven years since you last replaced the drive belt, it’s probably time for a new one. Luckily, replacing the belt won’t take long and the experts at Toro are here to lead you through the process!
How Do I Change the Drive Belt On a Snow Blower?
To get your Toro single-stage snow blower back to full force with a new drive belt, follow this step-by-step guide and get right back to taking on the winter!
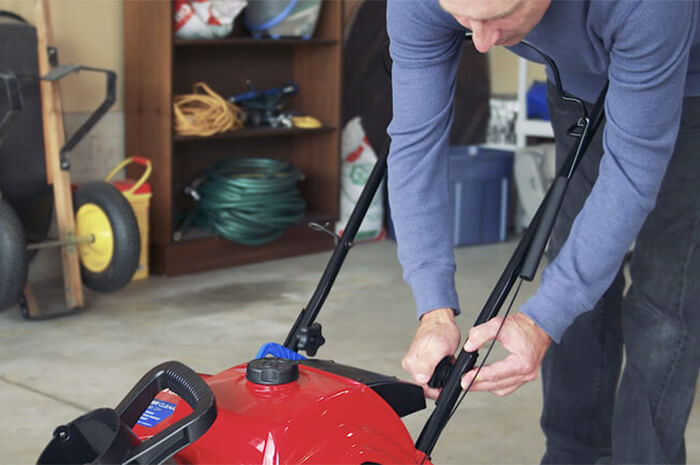
1. Remove Drive Belt Cover
Make sure your machine is off and then remove the drive belt cover that is on the side of your snow blower. Using a ratchet wrench will make removing the cover bolts and popping off the cover itself a quick job.
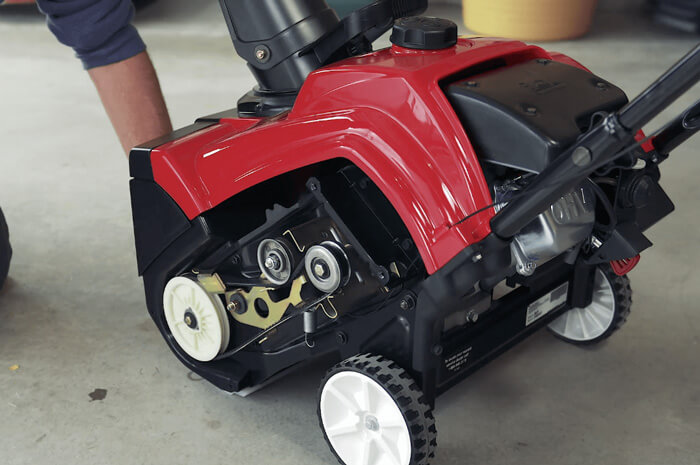
2. Release Tension & Remove Old Belt
Use a pair of needle nose pliers to unhook the brake spring from your snow blower’s idler arm. This will release the tension from the old belt and make it much easier, and safer, to remove. Take off the rotor pulley by removing the screw and washer and then pulling the pulley off its spindle. Once the rotor pulley is out of the way, it should be easy to remove the old drive belt.
3. Install Replacement Belt
Before you install the new drive belt, make sure it is the correct one for your snow blower either by checking Toro.com or contacting your local Toro dealer.
To install the new belt, first thread it around the engine pulley and under the idler pulley. Slide the rotor pulley back on its spindle and thread the belt around it as well. Reattach the washer and screw to hold the rotor pulley firmly in place. Check to make sure the belt is situated correctly before reconnecting the brake spring to the idler arm to put the belt under tension.
4. Put Cover Back On
The cover should fit snugly back in place using the same bolts you removed in step 1. If it doesn’t, check to make sure there is nothing obstructing the case from closing properly.
5. Check the Control Cable
To make sure the new drive belt is adjusted correctly, check the snow blower’s control cable. Keep the engine off and pull the control bar back to the handle. The gap between the pull bar and the handle should be between 1/16 and 1/8 of an inch, or 2 to 3 millimeters — this allows the rotor blades to stop correctly. If the gap is outside this range, adjust the control cable with these quick steps:
- Slide the spring cover up
- Unhook the spring from the adjuster link
- Move the Z-fitting on the link to a higher or lower hole, depending on if you need to increase or decrease the gap
- Adjust as needed until you’re in the correct gap range
6. Get to Work!
Once your belt is in place and the control cable is properly adjusted, you can head back out to take on the snow. If you are still noticing a lack of power when you use your snow blower, check that the new drive belt is installed correctly. For continuing issues, contact your local Toro dealer.
Your snow blower is one of the most useful tools in your winter arsenal, so be sure to check if the drive belt needs replacing before the heavy snowfall comes. Handling this kind of routine maintenance at the end of fall, or in the spring, will set you up to stay on top of your snow removal chores as winter weather starts to roll in.
Video Transcript
If your single-stage snow blower doesn’t seem to have the power that it used to, you might need to replace the drive belt. Drive belts can become worn or loosen up over time, so they need to be replaced periodically. This procedure is also covered in your owner’s manual.
Before you start, make sure your snow blower is turned off, then remove the drive belt cover.
Step 1: Release Tension on Old Belt
Next we need to release the tension on the old belt. To do this, unhook the brake spring from the idler arm. Remove the screw and curved washer that holds on the rotor poly pulley then take the rotor poly pulley off the spindle and remove the old drive belt.
Step 2: Replace With New Belt
Now that the old belt is out of the way, you can replace it with a new one. Be sure to use the right drive belt for your machine. You can find exactly what you need at Toro.com through your local Toro dealer.
Thread the new drive belt around the engine pulley, then under the idler pulley and finally around the rotor pulley, which should be positioned just above the rotor shaft. Reinstall the rotor pulley on the shaft and secure it with the curved washer and screw. Reattach the brakes spring to the idler arm. This will put the new belt under tension.
Step 3: Reinstall Drive Belt Cover
Finally, reinstall a drive belt cover with bolts you removed earlier. The new drive belt is in, but you need to make sure that it’s properly adjusted. Do this by checking the control cable.
With the engine shut off, move the control bar back toward the handle to remove the slack in the control cable. You should have a gap of 1/16th to 1/8th inches or 2 to 3 millimeters between the control bar and the handle. Now this little bit of slack needs to be there so the rotor blades stop properly, but if there’s too much slack or not enough you’ll have to adjust the control cable.
To do this, slide the spring cover-up and unhook the spring from the adjuster link. Move the Z-fitting on the link to a higher or lower hole, whatever is needed to get the correct gap between the control bar and handle. Once that’s adjusted, you’re good to go.
To Learn More or Watch More Videos head to Toro.com/helpcenter.