How to hit the easy button and protect your landscaping and container plants
Whether the growing season has just started, is well underway or you’re simply planning for next year, any time is a good time to embrace drip irrigation. Drip irrigation, also known as micro irrigation, lets you enjoy lush gardens and containers without the fuss of manual watering. A win-win that saves you time, water and money, all while making sure the fruits of your labor stay healthy and happy the entire season – even when you’re on vacation or the hot summer sun does its best to stifle your work.
How does drip irrigation work?
Drip irrigation is easy. In short, there are two options:
- Connect directly to your outdoor faucet. For this set-up, many use a hose-end or tap timer to make the system self-sufficient from the get-go. For those who have rain barrels or other low-pressure water sources, with the right equipment, you can also connect directly to these.
- Connect to an existing in-ground irrigation system where you can incorporate scheduled waterings through your existing controller (or upgrade to a smart controller such as the Toro EVOLUTION® to increase water efficiency and save money).
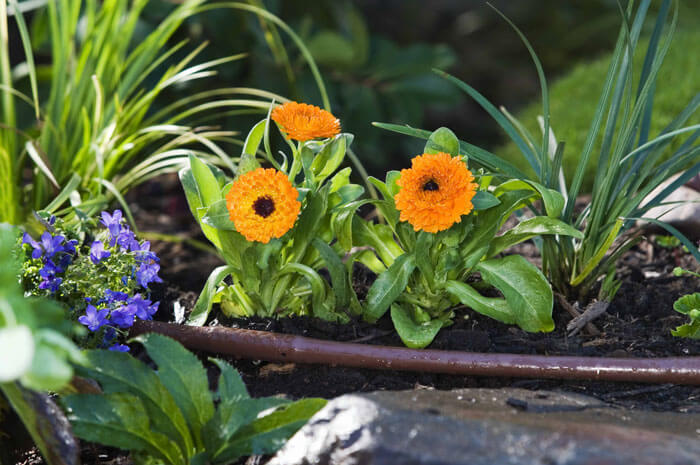
From your water source, tubing will connect the water to your shrubs, beds, gardens and containers. The drip tubing can be configured in infinite ways to customize to your landscape’s needs. You can also customize where you want the irrigation emitted from the tubing to maximize efficiency and minimize water use and runoff.
What are the benefits of drip irrigation?
Drip irrigation is the gold standard. Here’s why:
- Drip irrigation helps create healthier plants. It delivers water directly to the roots of plants, providing consistent moisture while reducing evaporation, along with the potential risk of disease for the plants.
- Drip irrigation reduces water usage. According to the United States Environmental Protection Agency (EPA), as much as 50% of the water used for outdoor irrigation is lost or wasted due to over-watering, runoff or evaporation. The EPA also shares that research indicates micro irrigation systems use between 20-50% less water than conventional spray sprinkler systems.
- Drip irrigation saves money through reduced water use and by protecting the investment you’ve made in your landscaping and containers.
- Drip irrigation saves time. It crosses “watering plants” off your to-do list.
How do I install a drip irrigation system for my landscaping and containers?
Installing a drip irrigation system really isn’t hard! It just takes a little planning to ensure you maximize your set-up and have the right products for your needs. Think through your drip irrigation needs and consider where your water source(s) are, what type of a water source you have and where your plants are located. This can help to sketch out the system you’re envisioning to think through the different elements your specific project will need.
To install your own drip irrigation system you’ll need:
- A Timer– If you’re connecting directly to an outdoor faucet or low-pressure water source, you’ll want to start with a timer. This will provide consistent watering on a schedule you determine (and can update, based on weather conditions), and it will ensure your plants stay healthy whether you’re home or not.
- Tubing – This also can be called a hose or pipe for your system. Tubing is available with or without pre-installed emitters, so you can choose the option that best fits your needs.
- Drip emitters – Drip emitters are fixed to tubing and apply water directly to the plants. There are several types of drip emitters suitable for various plant types and sizes. Drip emitters apply drops of water at a predetermined rate directly to plant roots. Adjustable Flow Stream and Bubble Emitters allow you to choose the perfect watering rate and adjust the flow as changes grow and water needs change.
- Fittings – Fittings such as elbows and tees are used to make connections when laying tubing throughout your system.
- Stakes – You’ve gone to the effort of creating and installing your drip system, so make sure all the elements stay in place by putting some stakes in along the line.
- End clamp(s) – This component is helpful for exactly what it sounds like – clamping off the end of your irrigation tubing.
Toro Drip Starter Kits are a great place to begin, as they provide a selection of frequently used drip emitters and hose accessories. From here, you can grab additional elements to perfect your customized system.
After acquiring the products for your needs, complete the installation and get ready to sit back, relax and enjoy the convenience and savings you’ll have with your new drip system.
Find more information about drip irrigation online at Toro.com or reach out to a local landscape professional.